After having many problems with my Windows Server 2008 R2 (Windows SBS 2011) running on VMware vSphere ESXi 4.0, I stumbled across and article that rightfully points out that Server 2008 isn’t supported until ESXi 4.0 Update 1.
So I began along the path of updating my ESXi Server from ESXi 4.0 to the current latest version which at the moment is ESXi 4.1 Update 1 (5 Jul 2011).
I found this process very confusing when it didnt have to be.
Update ESXi 4.0 Using Host Update Utility
ESX and ESXi come with the vSphere Client and Host Update Utility (Optional during installation).
This is a nice and simple tool, but it lacks some fundamental features which make it confusing and not too reliable. Such as a Progress Bar.
Running this process is not that efficient, because since I was running 4.0 with no updates, it wanted to download Update 1, then Update 2, Then Update 3 and including all the minor patches in between. Each patch consisting of about 200mb.

Coupled together with the progress bar stopping at 45%, it was near impossible to tell if and when an update had completed.
If you are going to use this method, I would suggest only running 1 or 2 updates at a time.
It took about 1.5 hrs to run 1 update.
Update ESXi 4.0 using esxupdate from the console
Bingo, this method was by far the simplest and quickest (I just wish i knew that before spending 2 hrs on the previous method.
Step 1 – Download the Upgrade Bundle
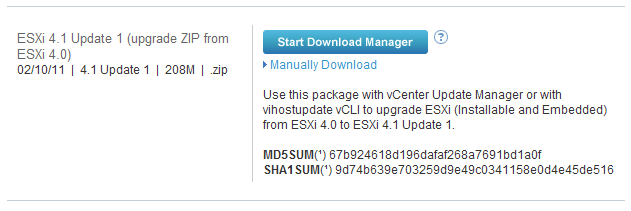
Before you can run an upgrade, you need to download the latest upgrade bundle from the VMware Download Center. Select ESXi and select to download VMware vSphere Hypervisor 4.1 Update 1.

Log in with your VMware account, then browse the list of downloads to find the relevant Upgrade Bundle. In this case, it is Upgrade ZIP fromESXi 4.0
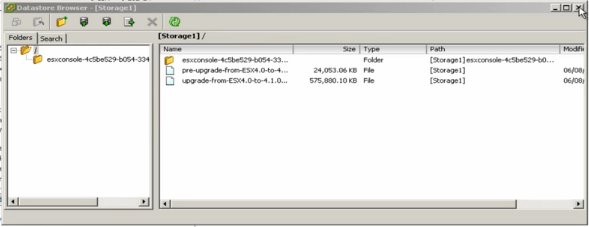
Step 2 – Upload the upgrade bundle to a datastore
You will need to upload the upgrade bundle to the root of a local datastore on the ESXi server, so it is accessible from the console.
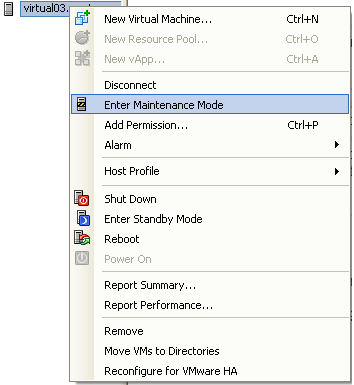
Step 3 – Enter Maintenance Mode
Using the vSphere Client, put your ESXi Server into Maintenance Mode. (Right click on server host, and select Enter Maintenance Mode…
Step 4 – Run ESXUPDATE Command
From the ESXi Console you will need to log into the command line interface:
To log in to the CLI: From the console, press Alt+F1. You will receive a blank screen, with a cursor that does not respond to any input. Type unsupported and press enter. You will be prompted for your password.
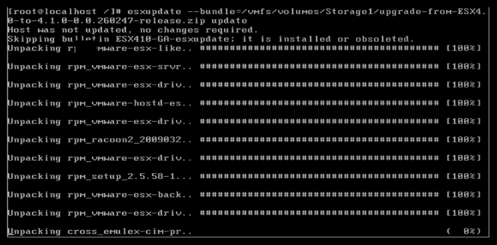
Run the command:
esxupdate --bundle=<Upgrade Bundle Path> update
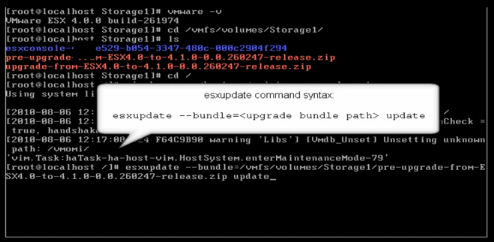
e.g.:
esxupdate --bundle=/vmfs/volumes/datastore1/upgrade-from-esxi4.0-to-4.1-update01-348481.zip update
The upgrade will take a few minutes to complete, and will return to a command prompt when finished.
Step 5 – Reboot the ESXi Server
From the CLI, enter the command:
reboot
or reboot the server using the vSphere Client.
More Help
This VMware KB article has video tutorials on how to upgrade your ESX or ESXi Server.
Most concise, yet accurate help guide I have found. (Only note, in your eg of esxupdate you need an “=” in the syntax, but the “=” character is in the screenshot, so it’s all good.)
Thank you!
Thank you!!!
YESS Sir!
i should read up to the end 😉
i tried this and that and it didnt work, but at the end i tried “copying the update to your datastore” and that worked fine
Thanks mate